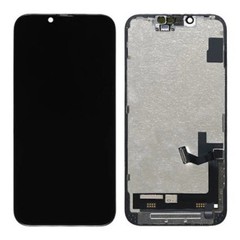
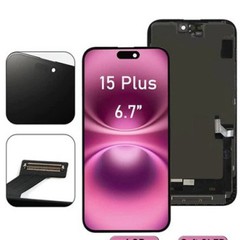
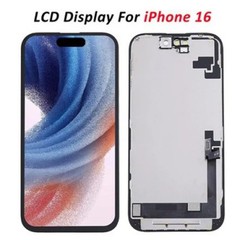

Can You Replace an iPhone Screen Yourself? Risks, Tools and Costs

Introduction
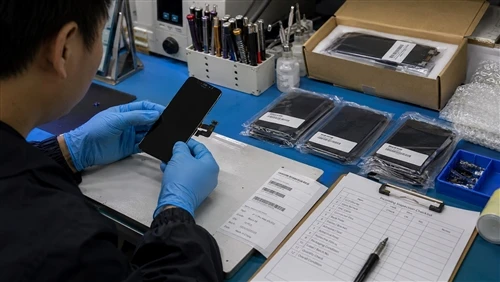
Someone with real repair experience, the correct model-specific documentation, and the right tools can, technically, replace certain iPhone screens without professional help. That does not make it a safe default for every device or every person.
The risks involve the battery, the display connector, the flex cables, the screen itself, the data on the device, and whether the finished repair actually works when tested. This guide walks through what DIY iPhone screen replacement actually requires, where it can go wrong, and when professional repair is the more responsible choice.
Quick Answer: Can You Replace an iPhone Screen Yourself?
Technically, yes, but only under specific conditions. A DIY repair is realistic when the person has verified, model-specific repair documentation, suitable tools, prior repair experience, an understanding of battery and connector safety, and a way to test the screen before and after installation.
It carries real risk regardless of experience level. A single mistake during opening, disconnecting, or reassembly can damage the screen, the battery, a flex cable, or a connector. If the device shows any sign of battery swelling, liquid exposure, overheating, or structural damage, the safer move is to stop and consult a professional.
DIY doesn't always fail, and professional repair doesn't always succeed. The outcome depends on the device, the person, and the preparation involved.
Why iPhone Screen Replacement Is Not the Same for Every Model?
One common assumption behind DIY screen replacement is that "opening an iPhone" is a single, repeatable process. It isn't. Across iPhone generations and variants, the opening method, the position of the display cable and battery connector, connector-cover design, screw types and lengths, adhesive layout, the display seal, and the components near the front sensor array can all differ.
Because of this, there is no single set of disassembly steps that applies safely to every iPhone. A procedure that's correct for one model can misalign a connector, stress a cable, or damage a seal on another. This is also why this guide doesn't walk through a universal teardown: doing so would either be too vague to be useful, or specific enough to create real safety risk if applied to the wrong model.
What You Need Before Attempting a DIY Screen Repair
A realistic self-assessment matters more than enthusiasm. Useful preparation includes:
- The ability to accurately identify the exact device model
- Verified, model-specific repair documentation rather than general instructions
- Basic electronic-repair competence and an understanding of battery-safety handling
- Comfort working with small connectors and flex cables without forcing them
- A system for keeping fasteners and brackets organized
- The ability to inspect the device for damage beyond the screen
- A way to test display and touch response before and after final reassembly
- The judgment to stop when something looks wrong
On the tools side, DIY repair typically calls for opening tools sized for the model, drivers for different fastener types, nonconductive handling tools for connectors and cables, adequate magnification and lighting, basic ESD precautions, appropriate replacement adhesive, and a way to record the device's condition and the steps taken.
The specific tools and how they're used depend on the exact model and its verified repair documentation. This guide doesn't specify heating parameters or prying depths because applying the wrong model's instructions can damage the battery, cables, housing, or display.
Owning a complete tool kit doesn't make someone ready for the repair. A tutorial can demonstrate one procedure on one device, but it can't supply the judgment needed when a connector resists, prior damage appears, or the device no longer matches the expected condition.

How Do You Choose the Correct Replacement Screen?
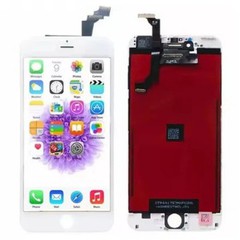
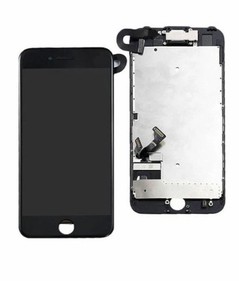
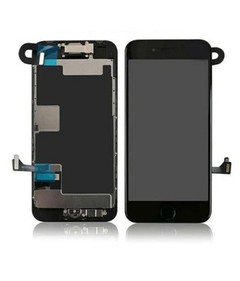
Choosing the right part starts with confirming the exact iPhone model, including the full suffix (standard, Plus, Mini, Pro, or Pro Max) and, where necessary, the model number. From there, several factors decide whether a given screen actually fits:
- The original display technology
- Supplier compatibility information
- The specific replacement-screen SKU
- The screen's technology and quality grade
- Whether it comes with or without a frame
- The product revision
Model confirmation answers which screens are physically and functionally compatible with the device. Screen-grade selection answers which compatible option best matches the goals of the repair. Similar screen size or a similar-looking connector doesn't guarantee full compatibility; pinouts, flex layouts, and functional behavior can differ even when two parts look alike.
What Are the Main Risks of DIY iPhone Screen Replacement?
| Risk Area | What Could Go Wrong | Possible Consequence | When to Stop |
|---|---|---|---|
| Battery handling | Puncturing, bending, or improperly disconnecting the battery | Swelling, overheating, fire risk | Any sign of swelling, punctured casing, or abnormal heat |
| Flex cables | Tearing, creasing, or overstretching a display or connector cable | Display or touch failure, intermittent faults | Resistance when disconnecting, visible cable damage |
| Connectors | Bent pins or forced connections | Non-functional display, board-level damage | Pins appear bent or misaligned before reconnecting |
| Wrong replacement screen | Ordering by size or price without confirming model and SKU | Poor fit, non-functioning features, wasted cost | Uncertainty about exact model or supplier SKU |
| Screen damage during installation | Excess pressure, flexing, or impact on the panel | Cracked glass, dead pixels, backlight issues | Any crack, discoloration, or display artifact appears |
| Housing deformation | Prying in the wrong location or using excess force | Poor screen fit, stressed seals, future gaps | Housing appears bent or does not sit flush |
| Liquid contamination | Repairing a device with prior liquid exposure | Corrosion, unpredictable board-level failure | Any visible corrosion, residue, or liquid indicator activation |
| Sensor-area components | Disturbing components near the front sensor array | Face ID or proximity-sensor issues | Uncertainty about handling sensor-area parts |
| Fastener mix-ups | Losing or swapping screws of different lengths | Board or housing damage from an incorrect screw | Fasteners are not clearly organized by location |
| Adhesive or fit problems | Reusing degraded adhesive or misapplying new adhesive | Loose screen, dust ingress, seal failure | Adhesive does not seat evenly or screen does not sit flush |
| Skipped testing | Sealing the device before verifying display and touch function | Reopening the device, repeated stress on seals and connectors | Display or touch has not been tested before final assembly |
| Calibration left unfinished | Not completing Apple's post-repair process where it applies | "Finish Repair" status or reduced functionality of the affected part | Check Apple's current instructions for the exact model and replaced part |
| Water-resistance assumptions | Believing a repaired device is factory-sealed again | False sense of protection, later liquid damage | Treat as a known limitation, not a stop condition |
| Data and privacy exposure | Not backing up or securing personal data before repair | Data loss if something goes wrong | Before opening the device, not after |
| Pre-existing device faults | Mistaking an unrelated device issue for a screen problem | Wasted part, unresolved original issue | Symptoms don't fully resolve after a known-good screen is installed |
This table is meant to support judgment, not to suggest every DIY repair will encounter every risk. Some rows are stop conditions; others are limitations to plan around from the start.

What Conditions Mean You Should Not Continue the Repair?
Certain findings mean the safest choice is to stop, not push forward:
- A swollen or otherwise visibly damaged battery
- Any liquid contamination
- Abnormal heat, a burning smell, or visible smoke
- Significant deformation of the housing
- Connector pins that appear bent or damaged
- Any sign of board-level damage
- Evidence of unknown prior modifications inside the device
- Unstable power behavior
- Damage that clearly extends beyond the display assembly
- The absence of reliable model-specific documentation
- A lack of suitable tools or technical competence for what's in front of you
Stopping at that point isn't a failed repair; it's the decision that keeps a screen issue from becoming a battery, board, or safety issue. A device in that condition is a better candidate for a qualified technician.
Should a Replacement Screen Be Tested Before Installation?
Yes, under safe conditions and as part of a proper repair workflow. Before final installation, it's worth confirming the product label matches the intended part, checking the physical condition of the screen and its connectors, and, where it can be done safely, briefly connecting the display to check image quality, brightness, color, touch response, multi-touch, edge touch, dead pixels, panel uniformity (sometimes called Mura), flicker, and initial stability.
A screen that passes an initial check has cleared one hurdle, not every hurdle. Pre-installation testing doesn't predict long-term reliability, and it doesn't replace testing the device again after the screen is fully installed. Skipping post-installation testing is one of the more common reasons repairs need to be reopened later.

Can DIY Screen Replacement Affect Face ID, True Tone, or Calibration?
Face ID. Face ID is provided by the TrueDepth camera system, not by the display panel itself. That said, screen replacement involves working near sensor-area components, and damage, incorrect handling, an unfinished calibration process, or a separate pre-existing fault can all affect how Face ID performs afterward. A Face ID problem after a repair shouldn't automatically be blamed on the replacement screen.
Calibration and Repair Assistant. On supported iPhone models, certain genuine Apple part replacements require Repair Assistant to install calibration data and finish the repair. An unfinished repair may leave a "Finish Repair" status, and the affected part may not perform as intended. Biometric functions can also remain unavailable when the relevant Face ID or Touch ID component requires calibration.
The exact result depends on the model, replaced part, software version, and Apple's current documentation. Check the current instructions for the exact device and part instead of applying one model's calibration requirements to another.
True Tone. Whether True Tone continues to work after a repair depends on the exact model, the original display's calibration data, the replacement screen's design, and the repair and calibration process used. Results vary by model and part, so the outcome is worth verifying directly on the repaired device rather than assumed in advance.
System and parts-related messages. How a specific iPhone reports information about installed parts depends on the model, the component, the software version, and Apple's current documentation. These messages shouldn't be treated as automatic proof that a screen is defective, and they can behave differently across models and iOS versions.
Will the iPhone Still Be Water-Resistant After DIY Repair?
Apple states that splash, water, and dust resistance is not permanent and advises users to avoid disassembling an iPhone, including removing its screws. Opening the device can affect the original seal, while installing new adhesive does not by itself prove that the factory-rated resistance has been restored.
The result depends on the adhesive, the condition of the housing, assembly quality, and whether the finished device has passed an appropriate test. Without that evidence, neither a DIY repairer nor a repair business should describe the phone as "waterproof" or claim that its original IP rating has been restored.
Is DIY Screen Replacement Really Cheaper?
Not automatically. The sticker price of a replacement screen is only one part of the real cost:
True DIY Repair Cost = Screen Cost + Tool Cost + Shipping + Consumables + Time Cost + Failed-Part Risk + Device-Damage Risk + Rework Cost + Professional Recovery Cost + Data-Loss Exposure
Someone who owns the correct tools and has completed the repair before is in a different cost position from a first-timer. The cheapest screen does not guarantee the lowest total cost, and a more expensive screen does not remove installation risk.
If the attempt fails, the owner may need a second screen or professional recovery. Damage beyond the display can cost more than the original repair, while downtime and possible data loss remain real costs even when they never appear on a receipt.
This guide won't invent a specific dollar figure or a DIY failure rate, since neither can be stated responsibly without verified data. The framework above is what an honest cost comparison actually requires.
DIY vs. Professional iPhone Screen Replacement
| Decision Factor | DIY Repair | Professional Repair | What the Reader Should Verify |
|---|---|---|---|
| Technical skill required | Falls entirely on the individual | Handled by a trained technician | Your own hands-on repair experience |
| Model-specific knowledge | Must be sourced and verified independently | Should be part of the shop's standard process | Whether documentation for your exact model is available |
| Tools | Must be purchased or already owned | Provided by the shop | Whether you have the right tools for this specific model |
| Model and part verification | Self-managed | Should be a standard shop step | Whether the shop confirms model and SKU before ordering |
| Screen testing | Depends entirely on the individual's setup | Should include pre- and post-installation testing | Whether the shop tests before and after installation |
| Repair documentation | Rarely kept | Should be part of a professional workflow | Whether the shop provides a repair record |
| Rework risk | Higher without experience | Lower with an established process | The shop's track record and warranty terms |
| Warranty and responsibility | None unless self-provided | Should be defined by the shop | What the warranty actually covers |
| Calibration and system procedures | May not be performed at all | Should follow current model- and part-specific guidance | Whether the shop addresses applicable post-repair steps |
| Final quality control | Self-assessed | Should be a defined step before return | Whether a final quality check is part of the process |
Not every repair shop performs to the same standard. Before choosing a provider, it's reasonable to ask whether they offer clear part options, a written quotation, an inspection of the device's condition, pre- and post-installation testing, clear warranty terms, and some evidence of technician experience or repair records.

Choosing Between DIY and Professional Repair
DIY is realistic when someone has relevant repair experience, can identify the exact model, has verified documentation and the right tools, understands battery and connector safety, can test the screen before and after installation, and accepts the financial and device risk. Meeting these conditions improves the odds of success; it doesn't guarantee it.
Professional repair is generally the better choice when any of the following apply: no prior repair experience, uncertainty about the model or SKU, a swollen battery or liquid exposure, a bent or damaged housing, a Face ID or sensor-area complaint, a high-value or business-critical device, no backup of important data, a need for a written warranty or calibration procedure, no reliable way to test the screen, or a previous failed DIY attempt.
A short decision path:
- Identify the exact model and inspect the device for battery, liquid, or structural risk first.
- Confirm the correct replacement-screen SKU and obtain verified, model-specific documentation.
- Honestly evaluate your own experience, tools, and ability to test the screen.
- Calculate the full DIY cost, including the risk of failure, and decide if the device and data are worth that risk.
- Stop immediately if unexpected damage or unsafe conditions appear at any point.
- If any requirement above can't be met, choose a qualified repair provider instead. Repair businesses should document the part, batch, technician, and test results for every job.
Why DIY Damage and Product Defects Must Be Separated?
This distinction matters for anyone running a repair business or buying replacement screens at volume, and for anyone trying to figure out what actually went wrong after a repair.
A display problem can trace back to the screen itself (a panel defect, a touch-layer issue, a driver or flex problem, batch inconsistency), to the installation (connector damage, a pinched flex cable, excess pressure, the wrong screen for the model, functional testing that was skipped), or to the device itself (a connector already damaged, a board-level issue, a bent housing from a prior drop, earlier liquid exposure).
A failed repair does not automatically prove the replacement screen was defective, and a passing pre-installation test does not automatically prove every later problem was caused by the installer. Sorting this out fairly requires evidence, not assumption.
For repair shops and screen buyers, that means keeping records worth having later: the model, screen SKU, batch number, pre-installation test results, device condition on intake, technician, observed symptom, photos or video where appropriate, and a final root-cause classification once the issue is resolved.

What Professional Repair Shops Should Explain to Customers?
Customers are better served, and shops face fewer disputes later, when a few things are made clear up front:
- The part options and quality grades available
- The difference between the price of the screen and the price of the complete repair
- Any pre-existing damage found on the device
- Exactly what the repair includes and what testing was completed
- The realistic limitations around Face ID, True Tone, and water resistance
- The scope of the warranty, including what physical damage is excluded
- How customer data and privacy are handled during the repair
- What the next steps are if a fault appears afterward
This information builds trust and prevents avoidable disagreements; it doesn't need to read like a liability disclaimer.
What Screen Suppliers Should Provide to Repair Businesses?
Repair businesses buying replacement screens are better positioned to deliver consistent results when their supplier provides:
- Clear model names paired with matching SKUs
- Real compatibility information
- Defined screen-technology and grade categories
- Product-revision identification and batch labeling
- Representative samples for evaluation
- Written specifications and guidance for pre-installation testing
- Adequate packaging protection
- Clear warranty terms and defined evidence requirements for RMA claims
- An accessible technical-support channel and notice when a product changes
For current product specifications, sample availability, warranty terms, and batch-identification details, repair businesses can contact our parts support team before placing a bulk order.

Common DIY iPhone Screen Replacement Mistakes
Beyond the risks already covered above, a handful of avoidable mistakes account for most DIY repair problems:
- Ordering by size or price alone, without confirming the exact model, suffix, and supplier SKU.
- Starting without model-specific documentation, relying on a generic tutorial instead.
- Skipping pre- or post-installation testing, then fully sealing the device before confirming it actually works.
- Forcing a connector or flex cable that isn't seating properly, or using excessive heat or pressure.
- Assuming Face ID, True Tone, or water resistance will automatically carry over, rather than verifying the outcome on the repaired device.
Each of these can lead to a damaged screen or device, an unnecessary second repair, or, for a repair business, a warranty dispute or a rejected RMA claim based on the wrong assumption about what caused the fault.
Frequently Asked Questions
Can a beginner replace an iPhone screen?
It's possible, but it isn't the lowest-risk starting point for someone with no prior repair experience. A beginner is more likely to run into connector, cable, or fit issues that a more experienced person would catch early. Verified documentation and realistic expectations matter more than confidence alone.
Is it safe to replace an iPhone screen yourself?
It can be, for someone with the right documentation, tools, and experience, as long as the device shows no signs of battery, liquid, or structural damage. Safety depends on the conditions, not on the general idea of DIY repair.
Is DIY iPhone screen replacement cheaper?
Not automatically. The screen's price is only one part of the total cost. Tools, time, the risk of needing a second part, and the possibility of professional recovery if something goes wrong all factor into whether DIY actually saves money.
Can replacing an iPhone screen damage Face ID?
Face ID relies on the TrueDepth camera system rather than the screen itself, but the repair process works near those components. Damage, incorrect handling, an unfinished calibration step, or a pre-existing fault can all affect Face ID, so it shouldn't be assumed the screen caused it without checking further.
Will True Tone work after a DIY screen replacement?
It depends on the exact model, the original display's data, the replacement screen's design, and the calibration process used. Results vary by model and part, so verify the outcome on the repaired device.
Why does a replacement screen work before installation but fail afterward?
This can happen for a few reasons: installation-related stress on a connector or cable, an existing device issue that wasn't caught earlier, or, less often, an intermittent screen defect that a brief pre-installation check didn't reveal. Post-installation testing is what usually catches this.
Conclusion
Someone with real experience, verified model-specific documentation, the right tools, and a way to test the result may be able to replace an iPhone screen. That does not make DIY the safe default for every user, device, or model.
A responsible repair starts by confirming the exact model and screen SKU. It stops if battery damage, liquid, overheating, or structural damage appears, and it includes testing before and after installation. Face ID, True Tone, calibration, and water-resistance outcomes must be assessed for the specific model and repair process.
The decision should also account for tools, time, rework, data exposure, and the risk of additional damage-not only the replacement screen's price.
For repair businesses, the same discipline applies at scale: standardized process, batch-level records, and a clear way to separate screen defects from installation issues or pre-existing faults are what make quality control, and fair warranty and RMA decisions, actually possible. If you can't confidently verify the exact model, the correct part, the repair procedure, and the safety conditions involved, a qualified repair provider is usually the more responsible option.
For repair shops and parts buyers: Send us your iPhone model list, target screen grade, and expected quantity through our wholesale screen inquiry form to confirm compatible replacement-screen options, sample availability, and batch details.