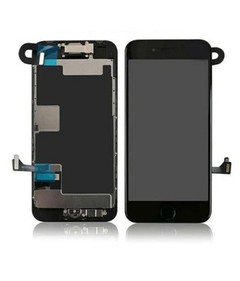
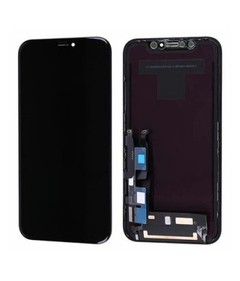
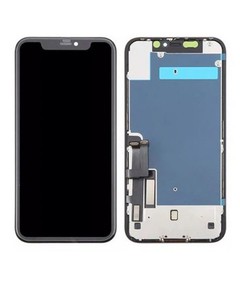
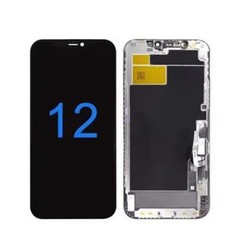

Signs Your iPhone Screen Needs Replacement: Repair Shop Guide
A cracked screen, a black display, or touch that no longer responds can all look like an obvious case for a new iPhone screen. In many cases they are. But the same symptoms can also come from a loose connector, a swollen battery, a bent housing, or a display setting, none of which a new screen will fix.
This guide walks through the most common warning signs and what each one can and cannot tell you on its own. It also covers the checks a repair shop should complete before ordering or installing a replacement screen, and the conditions where a device should be stopped and escalated rather than repaired on the spot.
Quick Answer: When Is It Time to Replace an iPhone Screen?
Screen replacement is generally worth considering when:
- Cracked glass creates a safety risk (sharp edges) or interferes with normal use or visibility.
- The OLED or LCD panel shows persistent damage, such as black areas, dead pixels, or ink-like spreading, that does not clear after basic checks.
- Touch failure is reproducible and does not go away after ruling out settings, accessories, or a known-good comparison.
- Lines, flickering, or a black screen remain after excluding software, connector, and device-side causes.
- The display assembly itself is physically loose, cracked internally, or structurally damaged.
If the device also shows battery swelling, a burning smell, unusual heat, liquid exposure, or a badly deformed housing, stop and address the safety issue first.
Apple warns that a battery cell damaged during removal can overheat, swell, vent, leak, or enter a thermal event. A swollen or visibly damaged battery should therefore be treated as a stop condition rather than a cosmetic issue.
Do not press the screen back into place, add adhesive over a lifted area, or treat the device as a routine screen swap until those risks are ruled out.

Sign 1: Cracked Glass Creates a Safety or Usability Problem
Not every crack means the display assembly has failed. A small cosmetic chip in a corner is a different situation from a spreading crack that crosses the active display area or leaves sharp, exposed glass.
Before recommending replacement, check whether the crack:
- Has sharp or loose glass that could cut skin.
- Crosses areas where touch response has become unstable.
- Blocks visibility or interferes with normal use.
- Has created an opening that risks dust or liquid getting under the glass.
- Has made the screen feel physically loose in the frame.
A shop can reasonably monitor a small cosmetic crack that shows none of the above. A crack with any safety, visibility, or structural issue is a stronger candidate for replacement, and a device with sharp exposed glass should not stay in daily use.
Sign 2: The Display Has Lines, Black Areas, or Image Distortion
Vertical or horizontal lines, black or ink-like spots, partial image loss, and abnormal color or tint are frequently reported as "screen damage," and they often are. But the same symptoms can also come from a stressed flex cable, a loose connector, a display driver issue, or a device-side circuit problem, particularly after an impact or a previous repair.
Treat these symptoms as a starting point for inspection, not a confirmed diagnosis. Note whether the pattern is constant or changes with pressure, movement, or temperature, since that detail helps separate a panel problem from a connection problem later in the diagnostic process.
Sign 3: The Screen Flickers or Loses the Image Intermittently
Flickering, a display that cuts out and comes back, or an image that changes when the phone is touched, moved, or set down can point to the panel, the flex cable, the connector, or a device-side fault.
Do not press, flex, or tap the screen to "confirm" or temporarily fix a flickering display. That can worsen a marginal connection or turn a repairable fault into a more serious one. Instead, record when the symptom happens, whether it is repeatable, and whether the device has any history of impact or previous repair.
Sign 4: Touch No Longer Works Reliably
Touch problems are not all the same, and they do not all point to the same cause:
- Complete no-touch across the whole screen
- Partial no-touch limited to one area
- Dead zones that never register input
- Edge-touch failure near the frame
- Intermittent touch that comes and goes
- Delayed or unstable touch response
- Ghost touch, where the screen registers input on its own
A single tap test is not enough to confirm touch is working correctly. Screen protectors, cases, moisture, an incorrect replacement part, bent housing, and software settings can all produce touch symptoms that look like a hardware fault but are not.
Sign 5: Dead Pixels, Bright Pixels, Mura, or Display Spots Affect Use
Dead pixels, bright pixels, Mura (uneven brightness or blotching, especially visible on gray or white backgrounds), pressure marks, and backlight spots on applicable LCD panels are display-quality issues rather than complete failures. They do not always mean the screen must be replaced.
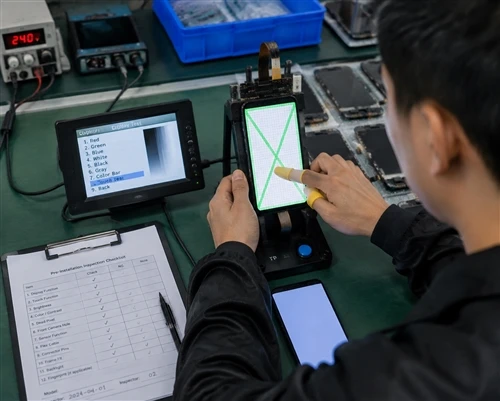
Whether a case justifies replacement or qualifies for a supplier RMA should be based on a reproducible fault, a suitable test pattern, clear photo or video evidence, and the supplier's written acceptance standard. Because pixel-defect policies vary by supplier and product grade, confirm the applicable standard before making a warranty decision rather than assuming a fixed allowance.
Sign 6: The Display Is Abnormally Dim or Uneven
Brightness instability, backlight issues on LCD assemblies, uneven white-screen brightness, or a shift in color can come from the panel, from display settings such as True Tone, Night Shift, or an accessibility feature, or from the device itself.
Any comparison should use the same iPhone model, the same brightness setting, the same content, the same lighting, and, where possible, a similar screen-protector condition. Comparing a bare screen to one under a protective film, or comparing two different iPhone models, produces a misleading result.
Sign 7: The Screen Is Lifting or Does Not Sit Correctly
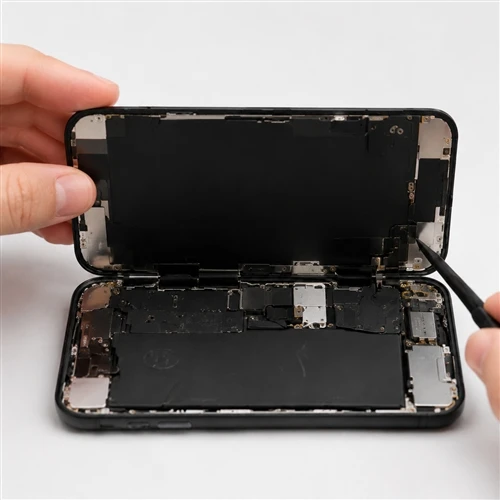
A screen that no longer sits flush in the frame can result from a bent housing, an incorrect screen model or thickness, a frame mismatch, adhesive failure, debris under the glass, or a flex cable that is not routed correctly.
It can also be a sign of a swollen battery pushing the display up from underneath. If battery swelling is suspected, stop. Do not add extra adhesive or press the screen back down to hide the lift. A swollen battery is a safety issue that needs to be resolved before any further screen work, not a cosmetic problem to seal over.
Sign 8: The Screen No Longer Responds After Impact or Liquid Exposure
An impact can damage the cover glass, the panel, the touch layer, the flex cable, the connector, the housing, or the device's internal circuitry, sometimes more than one of these at once. Liquid exposure carries the same risk across multiple components, not just the display.
Even when the visible damage looks limited to the screen, do not assume the fault is confined to the display assembly. A device with liquid contamination should not be treated as a routine screen swap. Depending on the severity, it may need a broader inspection or escalation to a technician equipped to evaluate board-level and corrosion-related damage.
Sign 9: The Screen Fails After a Previous Replacement
This scenario deserves particular attention from repair shops and parts buyers, because it is easy to assign blame in the wrong direction.
A fault appearing after a screen replacement can point to a latent defect in the replacement screen, to installation-related stress on the flex cable or connector, to housing deformation, to an incorrect screen variant for that model, or to an intermittent device-side issue that only became noticeable after the repair.
A post-installation failure does not automatically prove the replacement screen was defective, and it does not automatically prove the installation was done incorrectly. Reaching a fair conclusion, and supporting any RMA claim, generally requires pre-installation test records, a description of the device's condition, and where possible a cross-check against a known-good screen or known-good device.
Symptoms That Do Not Automatically Mean the Screen Must Be Replaced
Several common complaints can look like screen failure without actually being one:
- A temporary software freeze or crash
- Incorrect brightness, True Tone, or accessibility display settings
- A screen protector or case interfering with touch
- A battery or power issue affecting the display
- A damaged display connector rather than the panel itself
- A board-level display circuit fault
- Liquid damage affecting several systems at once
- A bent housing putting pressure on the screen
- An incorrect or incompatible replacement part
- Model-specific calibration behavior
- A sensor-area or Face ID complaint unrelated to the display panel
The underlying point applies across all of these: a repair recommendation should be based on inspection and testing, not on the customer's description of the symptom alone.
Screen Damage, Installation Problem, or Device Fault?
| Observed Symptom | Possible Screen-Side Cause | Possible Installation or Device-Side Cause | Safe Initial Check | Recommended Next Step |
|---|---|---|---|---|
| Cracked glass | Cover glass or panel damage | Structural damage from a drop | Inspect edges for sharpness and looseness | Assess safety and usability before deciding |
| No display / black screen | Panel or backlight failure | Connector, battery, or board-level fault | Check power and charging behavior | Isolate power vs. display before ordering a screen |
| Flickering | Panel or driver issue | Loose connector, flex cable stress | Note when and how the symptom occurs | Reproduce and document before replacing |
| Lines on display | Panel damage | Flex cable or connector contact issue | Compare against a known-good device if available | Cross-check before concluding it is the panel |
| Color distortion | Panel or driver defect | Display settings, device-side circuit | Review True Tone and accessibility settings | Rule out settings first |
| Dim or uneven display | Backlight or panel issue | Settings, battery, device condition | Compare under matched conditions | Confirm with same-model comparison |
| No touch / dead zones | Touch-layer defect | Installation pressure, incorrect part, bent housing | Test multiple areas of the screen | Confirm reproducibility before replacing |
| Ghost touch | Touch-layer or driver fault | Screen protector, moisture, device-side issue | Remove accessories and retest | Isolate cause before ordering |
| Dead pixels / Mura | Panel defect | Rarely installation-related | Use a proper test pattern | Compare against supplier standard |
| Screen lifting | Incorrect screen thickness, adhesive failure | Battery swelling, bent housing, frame mismatch | Check for swelling before touching the screen | Stop if battery involvement is suspected |
| Fails after prior replacement | Latent screen defect | Installation stress, wrong variant, device-side fault | Review installation and test records | Cross-check with known-good parts |
| Impact damage | Multiple screen components | Housing, battery, board-level damage | Full physical inspection | Escalate if damage extends beyond the display |
| Liquid exposure | Panel and touch layer | Corrosion, board-level, multiple systems | Check for corrosion and power stability | Escalate rather than treat as routine |
A symptom can justify inspection, but on its own it does not prove that the screen needs replacement, and it does not identify who is responsible for the fault.
How Repair Shops Should Confirm That Screen Replacement Is Appropriate?
- Confirm the exact iPhone model.
- Record the customer-reported symptom in the customer's own words.
- Inspect the device's physical condition, including the housing and existing screen.
- Check for battery swelling, liquid exposure, unusual heat, and structural damage before doing anything else.
- Review impact history and any previous repairs.
- Reproduce and document the fault, including conditions under which it appears.
- Check relevant display and accessibility settings.
- Test display and touch function where it is safe to do so.
- Inspect the visible connector and flex-cable condition, following the repair procedure applicable to that specific model.
- Compare against a known-good screen or known-good device where available.
- Separate screen-side, installation-side, and device-side possibilities based on what steps 1 to 10 show.
- Decide whether to replace the screen, continue device-side diagnosis, or stop and escalate.
- Record the final classification and the evidence behind it.

Replace the Screen, Continue Diagnosis, or Stop?
| Evidence or Situation | Recommended Direction | Evidence to Record |
|---|---|---|
| Verified panel or touch-layer damage; fault reproduces on a known-good compatible device | Consider screen replacement | Photos, test results, model confirmation |
| Fault also appears with a known-good screen installed | Continue device-side diagnosis | Known-good comparison result, device history |
| Fit, seating, or adhesive issue confirmed during inspection | Correct the installation issue | Description of the defect, before/after condition |
| Battery swelling, liquid contamination, abnormal heat, severe housing deformation, or board-level damage present | Stop and escalate | Photos, safety notes, condition at intake |
| Fault is reproducible, screen-side evidence is documented, and it meets the supplier's written RMA conditions | Consider RMA | Photos, video, batch data, test records |
This table is a decision aid. It does not replace a supplier's actual written warranty or RMA policy, which should be confirmed directly with that supplier.
How to Select a Replacement Screen After Diagnosis?
Once the evidence points to the screen, the next decision is which replacement screen is appropriate for the repair. That generally means confirming:
- The exact iPhone model and, where relevant, the specific model number.
- The correct part number or SKU for that model, confirmed directly with the supplier rather than assumed from a general listing.
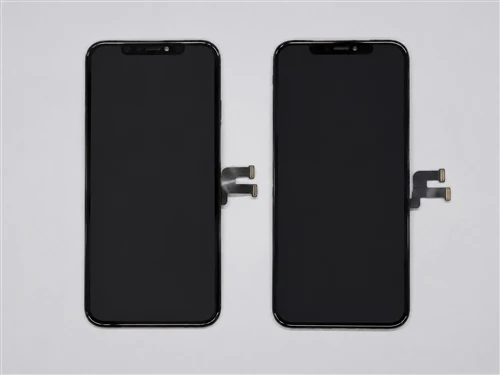
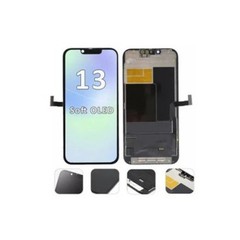
- The display technology involved, such as LCD, In-Cell LCD, Hard OLED, or Soft OLED, based on what the supplier actually offers for that model.
- Whether an original, original-pulled, refurbished-original, or aftermarket option is genuinely available for that model, without assuming every option exists for every device.
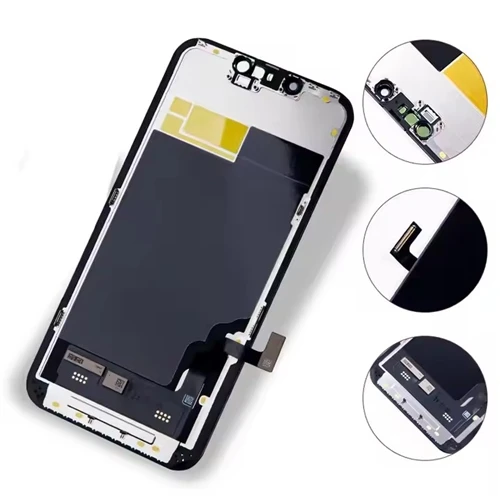
- The screen grade, and whether the frame is included or needs to be transferred.
- The repair tier the shop is targeting and what the customer has been told to expect.
- The written warranty terms attached to that specific screen and supplier.
Not every supplier offers every technology or grade for every model, and no single grade is the right choice for every customer. Matching the part to the confirmed model and the intended repair tier matters more than matching it to price alone.
How Screen Quality Affects the Repair Decision?
Display technology and product labels alone do not determine quality. In practice, the outcome of a repair also depends on display performance, touch response, physical fit, the condition of the flex cable and connector, assembly quality, batch consistency, packaging, and the supplier's testing and RMA process.
A useful way to frame this for a repair business is total repair cost, not just screen price:
True Repair Cost = Screen Cost + Logistics + Inspection + Labor + Rework + Warranty Handling + Return Shipping + Customer-Service Time
A lower-priced screen is not automatically a higher-rework screen, and a higher-priced screen is not automatically the more reliable one. Evaluating a supplier's actual test process and return rate is a more reliable guide than price alone.
What Repair Shops Should Document Before Recommending Replacement?
- Exact iPhone model and, where applicable, model number
- Customer-reported symptom
- Existing glass, display, and touch condition at intake
- Housing condition and any signs of battery swelling
- Known history of impact, liquid exposure, or previous repair
- Photos or video of the fault
- Conditions under which the fault was tested
- Result of any known-good comparison
- Recommended action and the screen option quoted
- Applicable warranty limitations
- Technician, repair date, and customer approval
Repair records shared publicly, in marketing material, or in RMA claims should have identifying details removed, including full IMEI or serial numbers, customer name, phone number, email address, passcodes, Apple Account information, or other private device content.

Common Mistakes When Deciding Whether to Replace a Screen
- Assuming every black screen means the display needs replacing, without checking power and connector behavior first.
- Treating cracked cover glass and internal panel damage as the same problem.
- Missing signs of battery swelling behind a lifted screen and sealing over it instead of stopping.
- Pressing, flexing, or tapping a flickering screen to "test" it, which can worsen a marginal connection.
- Attributing every touch problem to the screen without ruling out accessories, settings, or installation pressure.
- Skipping a check of display and accessibility settings before assuming hardware failure.
- Overlooking prior liquid or impact damage that could explain the current symptom.
- Ordering a replacement screen before the exact model has been confirmed.
- Recommending replacement before the fault has been reproduced and documented.
- Skipping a known-good comparison when one is available.
- Assuming every post-installation fault is a supplier defect, or assuming every one is technician error, without evidence either way.
- Choosing the lowest-priced screen without checking specifications, samples, or the supplier's test process.
- Promising Face ID, True Tone, or factory water-resistance outcomes that depend on device-specific components and calibration.
Each of these can lead to an incorrect repair, additional device damage, a safety risk, unnecessary rework, a warranty dispute, or a rejected RMA claim.
Face ID, True Tone, and Water Resistance After Screen Replacement
These three points come up often enough in repair conversations that they deserve a direct answer.
Face ID is provided by the TrueDepth camera system, not by the display panel. A screen replacement does not repair Face ID by itself. If Face ID fails after screen service, the TrueDepth components, prior device damage, repair handling, and any applicable post-repair process for that model should be checked before attributing the fault to the replacement display.
True Tone behavior after a screen replacement is not automatic either. According to Apple's own guidance on genuine displays, a non-genuine or improperly installed display can affect True Tone, ambient-light response, color calibration, maximum brightness, and even touch accuracy. These outcomes depend on the iPhone model, the display used, and whether the applicable repair and calibration process for that model was completed correctly. Verify brightness, color, and True Tone directly after the repair rather than promising the result in advance.
Apple states that splash, water, and dust resistance are not permanent and can decrease with normal wear even without a repair. A repaired device should not be described as having restored the phone's original factory water resistance unless that claim is backed by a verified process and test for that specific repair.
Frequently Asked Questions
Does a cracked iPhone screen need to be replaced immediately?
Not always. A small cosmetic crack with no sharp edges, no touch issues, and no structural damage can often be monitored. A crack that exposes sharp glass, crosses the display where touch has become unstable, or compromises the seal against dust and moisture is a stronger case for prompt replacement.
Does a black screen always mean the display is broken?
No. A black or unresponsive screen can come from the panel, the backlight on applicable LCD models, a loose connector, a battery or power issue, a board-level circuit fault, or the device's software state. Power and connector behavior should be checked before assuming the panel has failed.
Can ghost touch mean the iPhone screen needs replacement?
It can, but not always. Ghost touch can also be caused by a screen protector, moisture, a damaged connector, or a device-side issue. Removing accessories and retesting, ideally with a known-good comparison, helps confirm whether the touch layer itself is at fault.
Does replacing the screen fix Face ID?
No. Face ID is provided by the TrueDepth camera system, not by the display panel. A screen replacement does not repair Face ID by itself. If Face ID fails after screen service, check the TrueDepth components, repair handling, prior device damage, and any post-repair process applicable to the specific part and model before attributing the fault to the display.
Can software or settings issues look like screen failure?
Yes. Display brightness, True Tone, Night Shift, and accessibility settings can all produce symptoms that resemble a hardware fault, including dimness, color shifts, and unusual visual behavior. Checking settings is a fast step that should happen before assuming the panel or backlight has failed.
Why can a replacement screen fail shortly after installation?
A fault after installation can come from a defect in the replacement screen, from installation-related stress on the flex cable or connector, from an incorrect screen variant, or from a device-side issue that was present before the repair. Pre-installation testing and a clear record of the device's condition make it possible to identify which of these applies.
Conclusion
Cracks, display artifacts, unreliable touch, and a screen that no longer sits correctly can all justify a closer look at the display assembly, but none of them prove on their own that the screen is the cause. Battery swelling, unusual heat, liquid exposure, and severe housing damage take priority over any screen decision and call for a stop, not a routine repair.
For repair shops, the practical path is consistent: confirm the model, document the symptom, rule out settings and obvious external causes, test where it is safe to do so, and compare against a known-good part when possible. Only then should the shop decide whether to replace the screen, continue diagnosis, or escalate.
Once replacement is justified, matching the correct model, technology, and grade to the repair matters. Keeping test and batch records reduces the odds of a repeat failure or a disputed RMA claim.
If a symptom cannot be safely isolated, or if battery, liquid, heat, or structural damage is present, the device should be evaluated by a qualified repair professional before a replacement screen is ordered or installed.
Repair shops and parts buyers: send your iPhone model list, target repair grade, and expected quantity through our wholesale screen inquiry form to confirm compatible screen options, specifications, sample availability, and batch details.