
Why Do Replacement Screens Develop Display Lines?
A replacement screen most often develops display lines because the LCD panel itself, its flex cable, the way it was installed, or the phone's own display circuit introduces a fault somewhere along that chain. On their own, replacement screen display lines only confirm that something in the chain is broken - they don't say which link broke. The question that actually settles this is whether the line follows the screen or stays behind on the device. For a repair shop, that answer decides whether a warranty claim goes to the supplier or gets treated as an installation mistake. For a wholesale buyer, the same answer decides whether one line is a one-off unit problem or an early signal about batch consistency.
Quick Answer: Three Categories of Display-Line Problems
Most cases where display lines appear on a replacement screen fall into one of three groups, and each points to a different next step.
| Symptom Pattern | Likely Category | What to Check | Recommended Next Step |
|---|---|---|---|
| Line present before installation, on a fresh-out-of-box unit | Replacement-screen-related defect | Panel, FPC, connector, bonding area | Isolate the unit, do not install, document with the supplier |
| Line appears immediately after fitting the screen into the frame | Installation or handling damage | Flex folding, connector seating, frame pressure points | Reseat the connector and check for a pinched flex before assuming the panel is faulty |
| Line persists after swapping in a second, known-good screen | Device-side problem | Display connector on the board, prior repair damage, board-level circuitry | Treat as a device issue; a new screen alone may not resolve it |
This table is a starting point, not a verdict. A controlled swap test is a stronger indicator than any of these patterns read on their own - the next sections explain why.

What a Display Line Actually Represents?
A vertical line usually corresponds to a column of pixels not receiving the correct signal along one segment of the panel's drive circuitry. A horizontal line usually corresponds to a row affected the same way. Neither direction, by itself, proves where the fault originates - orientation mainly reflects how a given panel's internal wiring is laid out, and that layout can vary by display assembly.
A line that stays fixed in the same position under all conditions generally points to a stable, consistent fault - often physical damage to the panel or its connection. A line that flickers, shifts, or appears only when the phone is tapped near a specific spot more often points to a loose or partially damaged connection, such as a connector that isn't fully seated or a flex cable with a partial break. A short, partial line usually indicates localized damage to one section of the panel or flex. Multiple lines, or lines that widen over time, can indicate broader panel damage or a circuitry problem rather than a single point of failure.

Main Causes of Display Lines
Display lines are one entry in a wider pattern covered in common iPhone LCD defects and their root causes, but the mechanisms specific to line defects are worth separating out on their own.
Internal LCD or Display-Panel Damage
Internal panel damage can result from impact, pressure applied unevenly across the glass, or a fault in the display circuitry embedded in the panel itself. This type of damage is typically localized to the area where pressure or impact occurred, and it does not usually change when the screen is moved to a different device.
FPC or Flex-Related Problems
The flexible printed circuit (FPC) connecting the panel to its connector is one of the more fragile parts of any replacement screen. Folding the flex too tightly, bending it at the wrong angle during installation, or applying stress near the bonding area can create a partial break that shows up as a line - sometimes intermittently, since a partial break may still make contact under some conditions and lose it under others.
Manufacturing Defects
At the manufacturing stage, a display line can originate from a panel-level defect, an inconsistency in how the FPC is bonded to the panel, or a poor electrical connection introduced during assembly. These are quality-control issues rather than damage events, and they are typically present from the moment the unit is powered on for the first time - before any installation has taken place.
Installation Damage
Installation-related line defects are commonly associated with excessive pressure during fitting, bending the display while forcing it into a frame that hasn't been properly prepared, pressure points from screws or brackets seated incorrectly, and adhesive placed in a way that pinches the flex when the frame is closed. A screen that tested correctly on the bench before installation but shows a line only after being fitted into the device points toward this category.
Device-Side Problems
The device itself can be the source of the fault. A damaged display connector on the logic board, contamination or bent pins from a previous repair, or a board-level display circuit issue can all produce a line that has nothing to do with the replacement screen's quality. Replacing the screen a second time will not resolve a device-side fault, which is why isolating the device before assuming the screen is defective matters.
Manufacturing Defect vs. Installation Damage vs. Device-Side Issue
The table below is for telling the three categories apart conceptually - the next section covers how to actually test for which one applies to a specific unit.
| Indicator | More Likely Screen Defect | More Likely Installation Damage | More Likely Device-Side Issue |
|---|---|---|---|
| Visible before any installation | Yes | No | No |
| Appears only after fitting into the frame | Uncommon | Yes | No |
| Line disappears once a known-good screen is installed in its place | Yes | Sometimes | Less likely |
| Same line remains even after multiple known-good screens are tried | No | No | Yes |
| Visible flex crease, pinch mark, or connector damage | Sometimes | Yes | Sometimes (pre-existing) |
| Reproducible across multiple units from the same batch | Yes | No | No |
None of these rows is a standalone proof point, and the swap-test rows carry the most weight only when the swap itself was controlled - same connector seating, same frame, same handling between tests. If any of those conditions changed along with the screen, the result says less than it appears to. Where the underlying failure mechanism depends on the specific panel and FPC design, results can also vary by screen model and should be read alongside a physical inspection rather than on their own.
The Most Important Diagnostic Test: Does the Problem Follow the Screen or Stay With the Device?
This same logic underlies the broader challenge of separating a manufacturing-stage defect from installation damage across any LCD complaint, not just line defects - installation damage vs. manufacturing defect walks through that distinction in more depth. Here, the practical sequence for testing a display-line case looks like this:
- Confirm the symptom under normal, non-forced handling - note whether the line is fixed, flickers, or changes on its own.
- Inspect the screen and its flex visually for creases, pinch marks, or bonding separation.
- Check the connector on both the screen's flex and the board for bent pins, debris, or incomplete seating.
- If a second device is available, test the suspect screen on a known-good unit.
- Test a known-good screen on the original device, keeping connector seating and handling as close to identical as possible.
- Compare the two results side by side.
- Determine whether the fault follows the screen or stays with the device. This is the diagnosis itself, not a preliminary observation - everything before it exists to support this one conclusion.

Documenting the result
Once that determination is made, record it properly: the model, the batch reference, which device it was tested on, the test conditions, and supporting photos. A photo alone tells a supplier that a line exists; a photo alongside the model, batch, and test conditions tells them whether it's worth investigating as a pattern. That combination is what turns a diagnosis into evidence a supplier or a warranty desk can act on, rather than a technician's verbal assessment.
This sequence is more reliable than assuming the newest component in the chain - the replacement screen - is automatically the cause.
How to Test a Replacement Screen Before Installation?
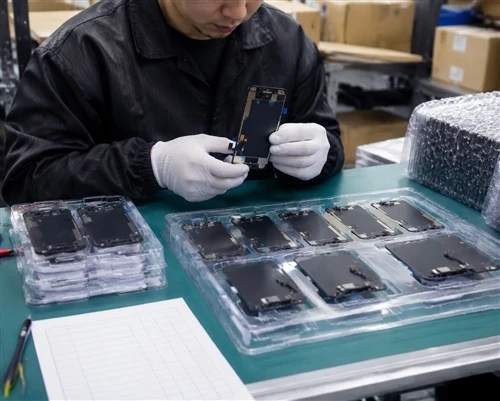
Testing before installation reduces the number of cases where a line is discovered only after the phone has been reassembled, which takes longer to diagnose and to reverse.
- Visual inspection of the panel surface for scratches, pressure marks, or discoloration
- Visual inspection of the flex cable for creases, kinks, or signs of prior bending
- Connector inspection for bent pins or residue
- Full-screen color test across white, black, red, green, and blue to expose lines that may not be visible on a busy image
- Brightness consistency check across the panel, since uneven brightness combined with a line can point to a broader panel issue
- Observation of the display during normal handling and connector seating, without deliberately bending or flexing the panel to provoke a fault
- Touch response test where the screen includes a digitizer, since a line can sometimes coincide with a separate touch fault
This pre-installation check lines up with the sample-to-bulk consistency controls a buyer should already be applying before approving a larger order, and it applies at both the single-unit level and the batch level.
Why Display-Line Defects Matter to Wholesale Buyers?
A single line on a single unit is a technician-level problem to troubleshoot. The same defect appearing across several units starts to look like a pattern worth investigating, and the same pattern repeating across a full batch is a procurement-level problem, because it changes the total cost of the order in ways the unit price never reflects.
Each defective unit that reaches a customer before being caught can generate a return shipment, a technician's diagnostic labor, and a customer complaint. In some cases it also leads to a dispute over whether the fault was pre-existing or installation-related. None of that shows up on the original invoice, but it adds up over the life of an order - which is exactly the broader challenge covered in the parent guide on how businesses can reduce iPhone LCD return rates, where display-line defects are just one of several contributing factors.
This is the reasoning behind evaluating a supplier on more than unit price. A supplier evaluation that also weighs sample quality, batch consistency, a documented QC process, how defects are handled when they're found, warranty terms, traceability by batch, and communication responsiveness gives a far more complete picture of what an order will actually cost once returns and labor are factored in.

How Wholesale Buyers Can Reduce Display-Line Returns?
Before ordering samples, confirm model compatibility and exact screen specification, understand how the supplier positions its quality tiers, and get warranty terms in writing before any money changes hands.
During sample evaluation, run the full-screen color test, check brightness and touch response together with line inspection, and inspect the connector and flex condition directly rather than relying on the panel looking fine from the front.
An iPhone 11Pro Max replacement LCD screen sourced for wholesale supply should go through this same checklist as a single retail unit - the model changes, but the test doesn't.
Before placing a bulk order, confirm the agreed specification in writing, get explicit sample approval on record, agree on packaging and QC standards, define how defects will be handled if the batch doesn't match the sample, and set expectations for batch-to-batch consistency rather than assuming the first good sample guarantees every unit that follows it.
After receiving bulk goods, apply an incoming inspection with a defined sampling plan, keep units grouped and identified by batch, and report findings back to the supplier promptly rather than discovering a pattern only after units have already been sold or installed.
Repeating this process consistently is what turns "choose a reliable supplier" from a vague goal into a process a buyer can actually run on every order.
Common Buyer Mistakes
- Assuming every display line means the LCD itself is defective, without checking whether the device could be the source
- Filing a supplier claim before completing the follow-the-screen-or-stay-with-the-device test
- Testing only one unit from a batch and generalizing the result to the rest
- Overlooking the phone's frame condition, which can introduce pressure-related lines that have nothing to do with the replacement screen
- Skipping flex inspection because the panel surface looks fine
- Installing a screen without a pre-installation color and flicker test
- Comparing suppliers on price alone, without factoring in the cost of returns and labor
- Not documenting a defect with enough detail (model, batch reference, test device, test conditions, photos) to support a claim later
- Agreeing to a bulk order without first agreeing on what QC standard the batch will be tested against
- Leaving warranty responsibility for line defects undefined until a dispute actually happens
A Simple B2B Decision Framework
This is where the earlier comparison and diagnostic test translate into an actual purchasing or QC decision. The scale of the response should match the scale of the pattern: a single unit calls for troubleshooting; several units call for looking for a pattern; a whole batch calls for a QC review; and the same pattern recurring across separate batches calls for a supplier-level conversation.
- If a line appears on one replacement screen only, and a known-good screen doesn't reproduce it on the same device: investigate the screen first.
- If the same line appears with multiple different screens on one device: investigate the device.
- If the line appears only after the screen was fitted into the frame, with no fault on the bench: investigate installation-related damage.
- If multiple units from the same batch show the same unusual line pattern: investigate batch-level quality and the supplier's QC process, rather than treating each case as unrelated.
- If the same pattern shows up again in a later batch after it was already raised once: that's no longer a batch-level question - it's a supplier-quality question.
These are diagnostic indicators that point toward the more likely cause, not conclusive proof on their own.
FAQ
Why does my replacement screen have vertical lines?
A vertical line most often points to a fault along one segment of the panel's internal drive circuitry. The underlying cause can be panel damage, a flex or connector issue, a manufacturing defect, installation pressure, or in some cases a device-side fault - which is why isolating the screen from the device is the first diagnostic step rather than assuming the panel itself is at fault.
Can installation pressure cause LCD display lines?
Yes. Excessive pressure while fitting the screen, bending the display against a poorly prepared frame, or pinching the flex during reassembly can all introduce a line that wasn't present before installation.
How can I tell whether a replacement screen is defective?
Testing the screen before installation - a full-screen color test, a flicker check, and a flex and connector inspection - is the most direct way to catch a panel-level defect before it gets attributed to installation or the device.
Can the phone itself cause lines on a replacement screen?
Yes. A damaged display connector on the logic board, prior repair damage, or a board-level display circuit issue can all produce a line that persists even after the screen is replaced again.
Should a replacement screen be tested before installation?
Testing before installation is the more efficient approach, since it catches defects before the phone is reassembled and reduces the diagnostic work needed if a line appears afterward.
How can wholesalers reduce display-related returns?
Consistent sample testing, agreed QC standards before bulk orders, batch-level incoming inspection, and clear warranty terms for line defects together reduce the number of cases that reach a customer before being caught.
Where This Leaves a Repair Business or Distributor?
The principle that matters most here - does the fault follow the screen or stay with the device - applies equally to a single technician diagnosing one phone and to a distributor reviewing a container of stock. What changes at scale is the cost of guessing wrong: a single misdiagnosed unit is a wasted hour, while a misdiagnosed batch pattern is a wave of returns, disputes, and customer complaints that could have been caught at the sample stage.
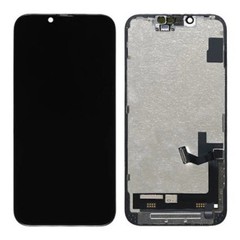
The same logic applies model by model. An iPhone 14 replacement LCD screen bought in volume should clear the same color, flicker, and flex checks as a single unit before it goes into stock, regardless of how well the supplier's other models have performed in the past.
One undetected line defect costs more than the sample ever would. A line found after a batch has already shipped to customers means re-diagnosis, return shipping, and a technician's time spent proving the fault wasn't installation error - costs that dwarf the price of testing samples properly up front.
If your business is evaluating replacement LCD suppliers, request representative samples and our QC information before your next bulk order. You're also welcome to send over your target model list and quality requirements so the samples we prepare actually match what you plan to stock.