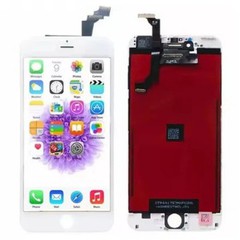
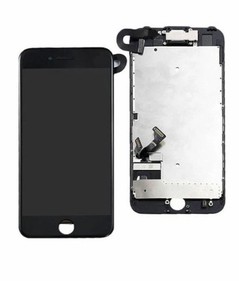
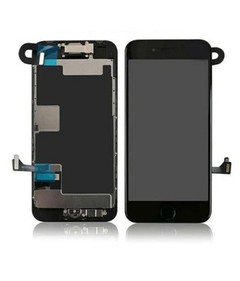
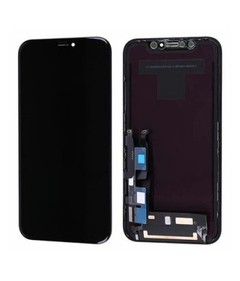


How to Replace an iPhone Screen Step by Step?

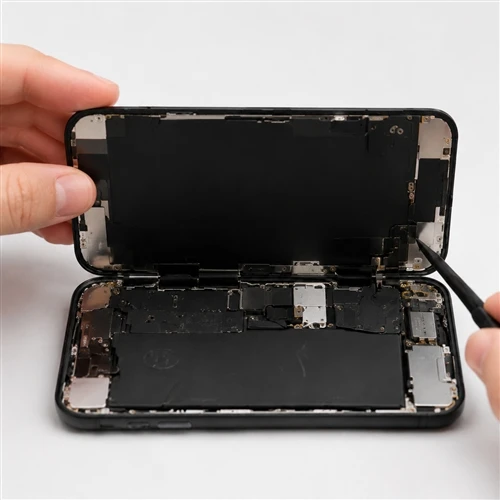
This guide presents a professional replacement-screen workflow for trained repair technicians and repair businesses. It is written for repair shops, refurbishment companies, and technical teams who need a consistent process - not for consumers looking to open their own phone. There is no single screw-by-screw sequence that applies to every iPhone model, and this article does not attempt to provide one. Exact disassembly, safety, component-transfer, calibration, and reassembly steps must be verified against current, verified model-specific repair documentation before work begins.
What a shop can standardize is everything around the disassembly: model confirmation, device intake, pre-installation testing, safety stop conditions, post-installation QC, and repair records. Getting that structure right is what actually reduces misordered parts, rework, screen damage, and disputed RMAs - more than any generic teardown instructions could. This article walks through that full 15-step workflow, from the moment a device arrives at the bench to the moment the repair record is filed.
Quick Answer: What Is the Professional iPhone Screen Replacement Process?
- Confirm the exact iPhone model and screen SKU.
- Inspect and document the device.
- Check safety stop conditions.
- Inspect and pre-test the replacement screen.
- Review model-specific repair documentation.
- Prepare tools, records and work area.
- Follow the correct power-safety procedure.
- Open the device using the model-specific method.
- Protect connectors, flex cables and original components.
- Handle retained original components correctly.
- Test the screen before final sealing.
- Inspect housing, frame and adhesive surfaces.
- Complete model-specific reassembly.
- Perform final testing and calibration.
- Record the repair and product traceability.
This is a professional workflow, not a universal teardown sequence. The exact physical procedures - opening direction, screw map, connector order, adhesive layout - vary by iPhone model and must come from verified, model-specific documentation, not from a general-purpose guide.
Step 1 - Confirm the Exact iPhone Model and Screen SKU

Every downstream decision depends on getting this step right. A screen order built on an assumed model, rather than a confirmed one, is one of the most common sources of returns and rework in bulk repair operations.
Before ordering or pulling a screen, confirm:
- Full model name (including Pro, Pro Max, Plus, or Mini where applicable)
- Model number or A-number, where required for precise identification
- Original display technology on the device
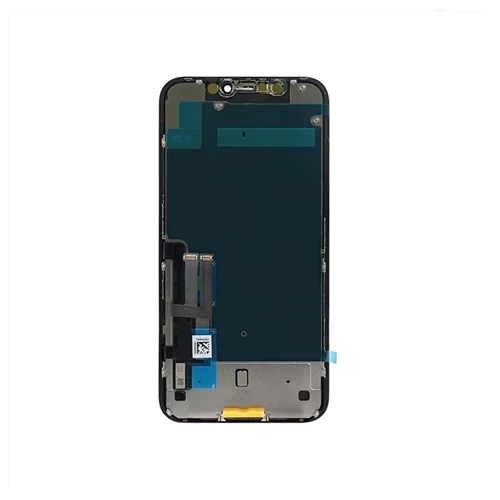
- Supplier SKU for the replacement screen
- Screen technology (LCD, In-Cell LCD, Hard OLED, Soft OLED)
- Screen grade
- With-frame or without-frame configuration
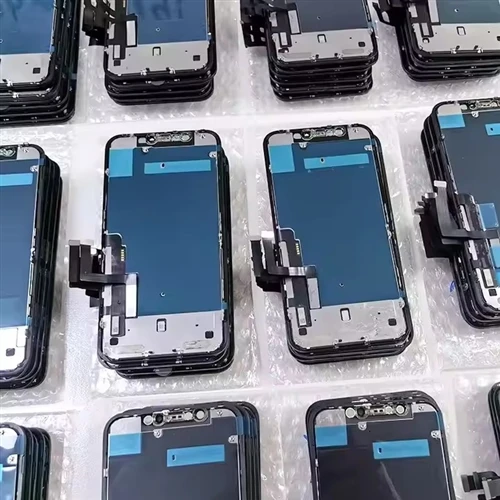
- Product revision and batch number
Same screen size does not mean the same screen assembly. Similar-looking connectors do not guarantee the same pinout, flex layout, or function. Standard, Plus, Mini, Pro, and Pro Max variants cannot be treated interchangeably, and a device model can never substitute for a supplier SKU (or the reverse) - "fits physically" is not the same claim as "fully compatible." Identify the correct iPhone model and confirm compatibility data before an order is placed.
| Information | Why It Matters | Where It Should Be Recorded |
|---|---|---|
| Full model name & number | Prevents ordering or installing an incompatible assembly | Repair ticket, intake form |
| Original display technology | Confirms expected baseline for comparison | Repair ticket |
| Supplier SKU | Ties the physical part to compatibility and revision data | Repair ticket, inventory system |
| Screen technology & grade | Sets customer expectations and pricing tier | Repair ticket, invoice |
| Frame option | Determines reassembly approach | Repair ticket |
| Batch number | Enables traceability if a defect pattern emerges | Inventory system, repair ticket |
Step 2 - Inspect and Document the Device
Before any tool touches the device, record its condition. This protects both the shop and the customer, and it gives the technician a clean baseline for distinguishing pre-existing issues from anything introduced during the repair.
Document:
- Existing screen and display condition
- Existing touch behavior
- Existing sensor-related complaints reported by the customer
- Previous impact or drop history
- Previous liquid exposure
- Evidence of prior repair
- Housing condition and any visible deformation
- Battery warning signs (see Step 3)
- Customer-reported fault, in the customer's own words
- Repair-ticket number, technician, date and time
Pre-repair photos and a written functional record materially reduce liability disputes later - "the touch issue was already present" is a much stronger position when it's documented before disassembly, not asserted afterward. Do not include full IMEI, full serial number, passcodes, customer names, contact details, Apple Account information, or any other personally identifiable information in photos, tickets shared externally, or case studies. Redact before anything leaves internal systems.
Step 3 - Check Safety Stop Conditions

Some conditions fall outside the scope of a routine screen replacement and should trigger an escalation rather than a continued attempt at installation:
- Battery swelling
- Battery puncture or other visible battery damage
- Abnormal heat
- Burning smell or smoke
- Liquid contamination
- Severe housing deformation
- Damaged display connector
- Board-level damage
- Unknown or unverified prior internal modifications
These situations should not be resolved by adding pressure, adding adhesive, or continuing to force disassembly. A swollen battery in particular should stop the process outright - the correct response is to isolate the device and route it to whatever escalation path the shop has for battery-safety issues, not to proceed with the screen swap.
Step 4 - Inspect and Pre-Test the Replacement Screen

A screen should be verified before it goes into the device, not discovered to be faulty after the old screen has already been removed. At minimum, check:
- Product label against the confirmed model, SKU, technology, grade, frame option, and batch number
- Physical condition: cover glass, frame, flex cable, connector, visible contamination, shipping or compression damage
- Functional behavior where the device and safety procedure allow it: image display, brightness behavior, black- and white-screen uniformity, color consistency, flicker, dead or bright pixels, Mura, basic touch, multi-touch, edge touch, and typing/dragging response
This is a screening step, not the full test protocol - follow your shop's complete display and touch testing procedure for the detailed pass/fail criteria.
Step 5 - Review Model-Specific Repair Documentation
Before opening the device, the technician should have the verified, model-specific procedure in hand - not be reconstructing it from memory or from a generic guide. This includes the opening method, power-safety procedure, display-cable position, connector covers, screw map, adhesive layout, original-component requirements, reassembly sequence, and any calibration or post-repair procedure specific to that model.
This article does not supply screw positions, cable orders, opening directions, or torque values for any specific model, because those details change by model and by revision. Filling them in from an unverified source is exactly the kind of shortcut that produces avoidable device damage - verify the procedure against current manufacturer-authorized or professionally validated model-specific repair documentation instead.
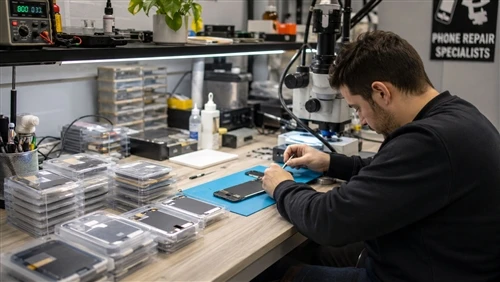
Step 6 - Prepare Tools, Records and Work Area
A clean, well-lit, organized bench reduces the two most common non-screen causes of rework: lost fasteners and contaminated connectors. At minimum, prepare:
- A clean work surface with good lighting
- ESD controls appropriate to the shop's setup
- A parts organization and screw-management system tied to the specific device
- Model-specific tools appropriate to the confirmed model
- A method for pre-installation screen testing
- Approved adhesive
- The repair ticket and batch record, ready to be filled in as work proceeds
- Privacy protection for any photos or documentation captured
There isn't one correct tool brand or organizational system - this step is about consistency within your own shop, not matching an external standard.
Step 7 - Follow the Correct Power-Safety Procedure

The specific power-safety sequence must be confirmed for the exact model being serviced - it is not interchangeable across devices. As general principles: avoid connecting or disconnecting display components while the device is in an uncertain power state, avoid shorting any connector or terminal, and avoid forcing a connector into place. If the device's power state cannot be safely confirmed, stop and escalate rather than proceeding on an assumption.
This article does not provide a universal connect/disconnect sequence, because the correct sequence depends on the model and must come from the verified documentation reviewed in Step 5.
Step 8 - Open the Device Using the Model-Specific Method
At the level this article can responsibly address, the working principles are:
- Protect the housing and internal components throughout.
- Use the opening direction specified in the verified model documentation.
- Control heat and force according to that documentation - not according to habit or estimation.
- Avoid inserting tools deeper than the verified safe area for that model.
- Track every removed fastener and bracket, ideally against a printed or digital screw map.
- Stop if you encounter unexpected resistance or signs of internal damage.
Specific heating temperature, timing, prying depth, or opening sequence are not provided here - those numbers only mean something in the context of a verified, model-specific procedure, and publishing unverified figures would create more risk than value.
Step 9 - Protect Connectors, Flex Cables and Original Components
Most installation-side failures trace back to this stage rather than to the screen itself. Give deliberate attention to display connectors and connector pins, flex cables, connector covers, sensor-area components, original components being retained, correct fastener placement, and debris or contamination in the work area. Misplaced screws or brackets, stressed flex cables, and contaminated connectors are common causes of symptoms that get mistakenly attributed to the replacement screen - the underlying cause is the handling, not the part.
Step 10 - Handle Retained Original Components Correctly
Some repair approaches involve retaining, transferring, or reinstalling original device components rather than components that ship with the replacement screen. Whether that applies, and how it should be done, depends on the exact model, the design of the replacement screen, the repair objective, available tools, calibration requirements, and the verified repair documentation for that model.
This article does not provide soldering instructions, Face ID component procedures, or any method for bypassing device security mechanisms. Those fall outside what a general workflow article can responsibly cover, and outside what should be attempted without verified, model-specific guidance and appropriate training.
Step 11 - Test the Screen Before Final Sealing
Where the device and the model-specific procedure allow it, connect and test the screen before final adhesive and sealing - image, brightness behavior, color, black and white screens, touch, multi-touch, edge touch, typing, dragging, flicker, display stability, connector behavior, and visible fit. A pass at this stage is useful, but it is not proof of long-term reliability, and it does not replace the final post-installation test in Step 14 - some issues only appear after full reassembly and normal handling.
Step 12 - Inspect Housing, Frame and Adhesive Surfaces
Before final reassembly, check for housing deformation, old adhesive residue, debris, frame damage, surface condition, screen thickness fit, flex-cable routing, battery swelling, and adhesive compatibility. A device should not be represented to the customer as having restored factory water resistance unless that claim is supported by an applicable, verified process and test - adhesive replacement alone does not guarantee this, and overstating it creates both a customer-trust problem and a potential liability issue.
Step 13 - Complete Model-Specific Reassembly
At a principle level: follow the verified fastener map, reinstall covers and brackets in their correct positions, avoid trapping or stressing flex cables, check connector seating without forcing it, confirm alignment before applying final pressure, follow the applicable adhesive and sealing procedure, and never force a screen that is not sitting correctly - a screen that doesn't seat properly is telling you something is misaligned underneath it. Generic screw positions, lengths, or torque values are intentionally not included here (see Step 5).
Step 14 - Perform Final Testing and Calibration

This is the checkpoint that should catch anything Step 11's temporary test didn't.
Display: image, brightness behavior, color consistency, white-screen uniformity, black-screen performance, flicker, lines, dead pixels, Mura, stability.
Touch: basic touch, typing, dragging, multi-touch, edge touch, dead zones, intermittent touch, ghost-touch observation.
Physical fit: screen sits correctly and flush, bezel alignment, no unexpected lifting, no excessive pressure point, housing condition, adhesive fit.
Device functions in the affected repair area: check only what is actually within the model and the scope of this repair - and do not imply that these functions are provided by the screen itself.
System and calibration: confirm the applicable procedure against current official documentation for the exact model - this changes over time and by model, so it should be verified at the time of repair rather than assumed from memory.
A note on Face ID and True Tone: Face ID depends on separate hardware, original components, sensor-area condition, installation quality, and model-specific procedures - it is not a feature the screen itself provides, and a screen should never be marketed or explained as "supporting Face ID." Similarly, True Tone behavior after a repair depends on the exact model, the original display data, the replacement screen's design, the tools and procedure used, and system behavior - it should not be guaranteed as an outcome.
Step 15 - Record the Repair and Product Traceability

Close the loop with a repair record that captures the model, screen supplier, supplier SKU, screen technology and grade, product revision, batch number, technician, repair date, pre- and post-installation test results, device condition and pre-existing damage, any calibration or system procedure performed, final result, what was communicated to the customer, and the warranty terms provided.
Over time, this record is what makes RMA investigation, technician training, batch review, supplier evaluation, return-rate analysis, and repeat-problem identification actually possible. Without it, every failure is a one-off instead of a pattern you can act on.
What Should a Technician Do If the New Screen Does Not Work?
- Stop and identify the exact symptom.
- Confirm the model and replacement-screen code against the ticket.
- Review the pre-installation test result on file.
- Follow the correct power procedure before touching anything.
- Visually inspect accessible connector and flex condition, safely.
- Determine whether the fault appeared before or after final assembly.
- Use a known-good comparison device or screen where available.
- Separate screen-side, installation-side, and device-side possibilities rather than assuming one.
- Save photos, video, and batch information as evidence.
- Correct the issue only if it's a confirmed installation problem.
- Escalate anything that looks like a device-side fault.
- Submit an RMA only when it's supported by evidence and the applicable written policy.
Common Screen-Replacement Mistakes Repair Shops Should Avoid
- Starting without confirming the exact model, size, technology, or grade - the single biggest source of wrong-part orders and mismatched installs.
- Skipping device-condition documentation before repair - removes the baseline needed to resolve later disputes.
- Ignoring battery, liquid, or heat safety-stop conditions - turns a screen job into a safety incident.
- Skipping pre-installation screen testing - installs a defective screen that could have been caught earlier.
- Connecting or disconnecting components without the correct power procedure, or using a universal teardown sequence for every model - the leading cause of unnecessary device damage.
- Mixing screws, brackets, or parts, or forcing connectors and flex cables during reassembly - causes fit issues, internal stress, and intermittent faults.
- Using excessive heat or pressure, or failing to inspect a bent housing before installation - damages housing, battery, or adjacent components, and sets the new screen up to fail.
- Fully sealing the device before functional testing - turns a five-minute fix into a full re-opening.
- Testing touch only once instead of thoroughly - misses intermittent issues that only show up with repeated use.
- Assuming every post-installation fault is a defective screen - or always technician error - overlooks the possibility on either side and slows down root-cause analysis.
- Promising Face ID, True Tone, or restored water resistance without model-specific verification - sets expectations the repair may not be able to meet.
- Failing to record the screen batch - makes supplier-side defect patterns invisible.
- Submitting an RMA without reproducible evidence - slows down or invalidates a legitimate claim.
A Printable Pre-Repair / During-Repair / Post-Repair Checklist
Before opening the device
- Model, SKU, technology, grade, and batch confirmed
- Device condition and customer-reported fault documented
- Safety stop conditions checked and cleared
- Replacement screen inspected and pre-tested
- Model-specific repair documentation reviewed
- Work area, tools, and repair ticket ready
During the repair
- Power-safety procedure followed
- Device opened per the model-specific method
- Connectors, flex cables, and original components protected
- Retained original components handled per the verified procedure
- Screen tested before final sealing
- Housing, frame, and adhesive surfaces inspected
After reassembly
- Model-specific reassembly completed
- Final display, touch, fit, and calibration tests performed
- Repair record and batch traceability filed
FAQ
Is there one screen-replacement procedure for every iPhone model?
No. Opening direction, cable position, screw layout, adhesive design, and calibration requirements differ by model. What can be standardized is the surrounding workflow - intake, testing, documentation - while the physical disassembly follows verified, model-specific documentation.
Should an iPhone replacement screen be tested before installation?
Yes. Checking product identity, physical condition, and basic display/touch function before the screen goes into the device catches defective units before labor is invested in installing them.
When should a technician stop a screen replacement?
When conditions like battery swelling, liquid contamination, severe housing deformation, or board-level damage are present. These fall outside routine screen replacement and should be escalated rather than pushed through.
Can a repair shop restore the original water resistance after screen replacement?
Not as a default claim. Restoring factory water resistance depends on the specific process and materials used and should only be represented to a customer if it's supported by a verified process and test.
Does a replacement screen control Face ID?
No. Face ID relies on separate hardware, sensor-area components, and installation quality - the screen itself does not provide it, and a screen should not be marketed as "Face ID compatible."
Will True Tone always work after an iPhone screen replacement?
Not guaranteed. The result depends on the model, the original display data, the replacement screen's design, the tools and procedure used, and system behavior - this should be explained to customers rather than promised.
What should a technician record after replacing an iPhone screen?
Model, screen SKU and batch, technician, date, pre- and post-installation test results, device condition, any calibration performed, and the final outcome. This record is what makes future RMA and quality review possible.
What evidence is needed for a replacement-screen RMA?
Documented pre-installation test results, post-installation test results, batch and SKU information, and evidence (photos, video, or a known-good comparison) that ties the fault to the screen rather than to installation or the device itself.
Conclusion
Professional iPhone screen replacement starts before a single fastener is removed - with confirming the exact model and product, and documenting the device's condition. There is no universal teardown sequence that safely applies to every iPhone; the physical disassembly has to follow verified, model-specific repair documentation.
What the shop can and should standardize is everything around it: intake, safety stop conditions, pre-installation testing, temporary and final function testing, and repair records. Handled consistently, that structure is what separates a repeatable, defensible repair process from one that generates avoidable rework and disputed RMAs.
Need help matching wholesale iPhone replacement screens to your repair volume? Send your iPhone model list, target screen grade, and expected quantity through our wholesale screen inquiry form. You can also request available specifications, batch-identification details, and sample options before placing a bulk order.