
Common iPhone Replacement Screen Problems: Diagnosis and Prevention for Repair Shops

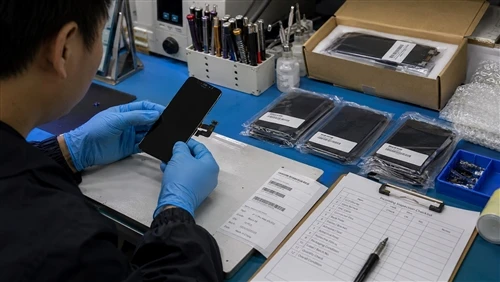
This article focuses on problems found before, during or after professional iPhone replacement-screen installation. It is intended for repair technicians, repair-shop owners, refurbishers, wholesalers and quality-control teams - not for unsupported consumer self-repair.
Most iPhone replacement screen problems come from one of four sources: the screen, the installation, the device, or a model mismatch. Before replacing the part or submitting an RMA, technicians should reproduce the symptom, safely inspect the installation, and use a known-good comparison to identify which source the fault follows.
Treating every complaint as "a bad screen" - or every screen problem as "the technician's fault" - leads to unnecessary returns, wasted stock and disputes that never get resolved. This guide walks through the most common symptoms technicians and QC teams encounter, the checks that separate one cause from another, and the point at which a case is ready for reinstall, correction, further device diagnosis, or an RMA submission.
Quick Triage: What Should a Technician Check First?

Before treating any symptom as a defect, work through this sequence. Always power down the device and disconnect the battery connector before touching the display connector or flex cable - never inspect or reseat a connector on a powered device.
- Confirm the exact iPhone model.
- Confirm the screen part number and product variant.
- Review the device's condition and repair history.
- Check whether the screen passed pre-installation testing.
- Power down and disconnect the battery before any connector work.
- Inspect visible flex-cable and connector condition.
- Reproduce and document the symptom.
- Use a known-good comparison where appropriate.
- Separate screen, installation and device possibilities.
- Stop if battery swelling, liquid exposure or overheating is present, and escalate to a qualified technician.
This is a triage sequence, not a full disassembly procedure. Specific installation steps should always follow model-specific, verified repair documentation. The full symptom-by-symptom decision logic in this guide builds directly on these ten checks - the decision path later in this article shows how they connect into a single flow rather than repeating them.
Common Replacement-Screen Problems at a Glance
| Symptom | Possible Screen Cause | Possible Installation or Device Cause | Safe Initial Check | Recommended Next Step |
|---|---|---|---|---|
| No display / black screen | Panel or driver defect | Connector not seated, device-side display circuit | Power off, reseat and inspect connector | Retest with known-good screen or device |
| Flickering | Panel/backlight instability | Loose connector, installation pressure | Power off, check connector seating | Known-good cross-test |
| Display lines | Panel or flex-cable defect | Pinched cable, connector damage | Power off, inspect flex-cable routing | Isolate on known-good device |
| Abnormal color | Panel defect | Connector contact issue | Compare against reference image | Retest after reseating |
| Dim display | Backlight/OLED defect | Display setting, driver issue | Check brightness settings first | Compare under identical settings |
| Uneven brightness | Mura, panel inconsistency | N/A | Use standard test pattern | Document and evaluate against spec |
| No touch | Touch-layer defect | Connector, installation pressure | Power off, reseat connector | Full-surface touch retest |
| Ghost touch | Touch-layer instability | Housing deformation, connector issue | Remove case/accessories, retest | Known-good cross-test |
| Intermittent touch | Flex-cable defect | Installation pressure, debris | Power off, inspect connector area | Retest after cleaning/reseating |
| Dead or bright pixels | Panel defect | N/A | Use standard test pattern | Document with photo/video |
| Mura or display spots | Panel inconsistency | N/A | Use standard test pattern | Evaluate against supplier spec |
| Poor fit / screen lifting | Frame mismatch | Wrong model, adhesive issue, bent housing | Confirm exact model | Reinstall with correct parts |
| Failure after final assembly | Latent panel defect | Pinched cable, excess pressure | Reopen and inspect cable routing | Compare pre- vs post-installation test |
| Sensor-area / display-feature complaints | Rarely screen-related | Original component handling, device history | Confirm which component is involved | Escalate for individual diagnosis |
A symptom alone does not prove that the replacement screen is defective. Diagnosis should compare the screen, installation, device condition and model compatibility before any conclusion is reached.
Problem 1 - No Display or Black Screen After Replacement
What the technician may observe: The device powers on (vibration, sound, or camera activity) but the display stays black, or the device shows no response at all.
Possible screen-related causes: Panel defect, display-driver failure, damaged flex cable.
Possible installation or device-related causes: Connector not fully seated, debris between connector and board, pre-existing device-side display circuit damage.
Safe diagnostic checks: Power down safely and disconnect the battery, inspect and reseat the connector, check for visible debris or bent pins, and test with a known-good screen if available.
Corrective action: If reseating resolves the issue, document it as an installation correction rather than a screen defect.
When to consider an RMA: If a known-good screen also shows no display on the same device, the fault is device-side. If the suspect screen shows no display on a known-good device, it supports an RMA case - with evidence attached.
Prevention: Always complete pre-installation testing and confirm connector seating before final assembly.

Problem 2 - Screen Flickering
Flickering can originate from panel or backlight instability, a display-driver issue, a loose or damaged flex-cable connection, installation pressure on the connector, a device-side display circuit problem, or an incorrect model or product variant. Avoid tapping, pressing or flexing the screen as a way to "test" or resolve flickering - this can mask or worsen the underlying issue and creates false assurance about a fault that hasn't been isolated.
Problem 3 - Lines, Color Distortion or Display Artifacts
Vertical lines, horizontal lines, color shift, unusual tint or partial-image display should be evaluated against the same four-source framework: panel condition, flex-cable and connector integrity, installation pressure, and device-side circuitry. Compare the artifact's behavior under gentle, powered-off flexing of the housing - artifacts that shift when the housing is flexed often point to a connector or cable issue rather than a fixed panel defect.

Problem 4 - Dim Display or Uneven Brightness
Before treating dimness as a defect, rule out display settings and confirm both devices are compared under identical settings, content and ambient lighting.
Genuine dimness may relate to a backlight or OLED-panel issue, product-grade specification, or a driver-side problem. Mura and brightness unevenness should be evaluated using a standard test pattern rather than casual observation, and against your team's written brightness and uniformity specification.
Problem 5 - Touch Does Not Work
Distinguish between complete no-touch, partial no-touch, dead zones, edge-touch failure and intermittent touch - each points toward a different likely cause among the touch layer, flex cable, connector, installation pressure, model compatibility and device-side circuit. A full-surface and edge test, not a single tap, is needed to characterize the fault correctly.
Problem 6 - Ghost Touch or Unstable Touch
Ghost touch can stem from touch-layer instability, a flex-cable or connector issue, installation pressure, housing deformation, the charging or electrical environment, accessory interference, a device-side problem, or - less commonly - a batch-level inconsistency. Before concluding anything, retest with the device unplugged, without a case, and away from other electronics, then repeat typing, dragging, multi-touch and edge-touch actions.

Problem 7 - Dead Pixels, Bright Pixels, Mura or Display Spots
These should always be documented using a standard test pattern, with photos or video saved for the record. Evaluate against your team's written acceptance standard rather than an assumed industry number - there is no single universal tolerance for dead or bright pixels. For detailed test-pattern methodology, see How to Check Dead Pixels and Display Defects.

Problem 8 - Screen Does Not Fit or Stay Flush
Poor fit can result from an incorrect model, frame mismatch, bent housing, debris, an adhesive or assembly issue, a thickness difference between screen batches, flex-cable routing, or battery swelling.
If battery swelling is suspected, stop work immediately and escalate to a qualified technician - do not attempt to force the screen flat with pressure or additional adhesive.
Problem 9 - The Screen Works Before Installation but Fails After Assembly
A screen that passes pre-installation testing but fails after final assembly points toward a pinched or stressed flex cable, excessive installation pressure, connector movement during assembly, housing deformation, internal interference, or damage introduced during assembly.
It can also reveal a latent screen defect or an intermittent device-side fault that didn't surface during a brief pre-test. Passing pre-installation testing does not automatically make a later failure the technician's responsibility, and it does not rule out an underlying screen issue either.
Problem 10 - True Tone, Sensor or Parts-Related Complaints
Complaints in this category require careful separation between the display and touch layer itself, sensor alignment, handling of original components, True Tone data or calibration, and model-specific repair behavior or system messages.
True Tone results depend on the exact iPhone model, original display data, repair tools used, and the calibration process - replacement screens should never be marketed or assumed to guarantee True Tone retention. Do not provide or suggest methods that bypass safety or identity-verification mechanisms; escalate model-specific system-message complaints for individual review against current official Apple documentation.
How to Separate a Defective Screen From an Installation or Device Problem?
- Test the suspect screen on a known-good compatible device where appropriate.
- Test a known-good screen on the original device.
- Compare display and touch behavior before and after final installation.
- Inspect connectors and flex cables safely, with power disconnected.
- Review the device's previous impact, liquid exposure and repair history.
- Check whether the fault is repeatable rather than one-off.
- Record every test condition and result in writing.
Known-good cross-testing narrows the likely source of a fault - it is a strong diagnostic signal, not a substitute for complete technical diagnosis or a guaranteed answer.

Reinstall, Replace, Diagnose the Device or Submit an RMA?
The ten triage checks above feed directly into this decision table - once a symptom has been reproduced and cross-tested, match the evidence to a row below:
| Evidence or Situation | Recommended Action | Evidence to Save |
|---|---|---|
| Verified installation issue (loose connector, pinched cable) | Correct installation and retest | Photos of connector/cable before and after correction |
| Known-good screen shows the same fault on the device | Escalate for device-side diagnosis | Test log, device history |
| Suspect screen fails on a known-good compatible device | Consider RMA | Cross-test video, model and part numbers |
| Physical damage to the screen found on inspection | Not RMA-eligible in most cases; document handling | Photos of damage location |
| Incorrect model or part installed | Reorder correct part | Order record, part number comparison |
| Repeated issue within the same batch | Flag batch to supplier for review | Batch number, affected quantity, symptom pattern |
| Fault cannot be reproduced | Hold for further observation before RMA | Test conditions attempted |
| Issue falls within written warranty terms | Proceed with RMA per your team's written policy | Full evidence package |
What Evidence Should a Repair Shop Save for an RMA?
- Purchase order or invoice
- Exact iPhone model
- Screen product code and batch number
- Screen technology and grade
- Quantity tested and quantity affected
- Test date and pre-installation test result
- Clear symptom description
- Photos and video of the fault
- Known-good comparison result
- Connector and flex-cable condition
- Packaging condition
- Technician notes and installation status

How Repair Shops Can Prevent Repeat Screen Problems?
Before purchasing: define required grades, request written specifications, test representative samples, confirm model compatibility, and review warranty and RMA terms in advance.
Before installation: confirm the exact model, inspect device condition, inspect the screen, run a pre-installation display and touch test, and record product and batch information.
During installation: follow model-specific procedures, protect flex cables, avoid excessive pressure, check housing condition, and use the correct frame and adhesive process.
After installation: retest the full display, test basic and edge touch, test multi-touch, check fit, observe stability over time, and record technician and part information.
During after-sales review: categorize return reasons instead of grouping everything as "bad screen," separate product and installation faults, monitor patterns by model and batch, review recurring issues with the supplier, and update purchasing and technician standards accordingly.

How Wholesalers Should Analyze Screen Failure Data?
Wholesalers benefit from using consistent failure codes rather than a single generic "bad screen" category, and from separating returns into screen-fault, installation-fault, device-fault and no-fault-found buckets before calculating a defect rate. Aggregating data by model, grade, batch and customer makes it possible to spot a genuine batch issue early - but return reasons should be verified before they're counted against a supplier's defect rate, and no legitimate quality complaint should be excluded simply to improve a reported number.
Common Troubleshooting Mistakes
- Assuming every black screen is defective
- Skipping pre-installation testing
- Ignoring the correct power-safety procedure
- Using the wrong model or product variant
- Ignoring a damaged connector or bent housing
- Pressing or bending the screen to "make it work"
- Testing touch only once
- Fully installing before completing functional tests
- Failing to save photos and batch information
- Submitting an RMA without reproducing the fault
- Treating every return as a product defect
- Blaming every fault on technician error
- Mixing batches during an investigation
- Ignoring repeated model or batch patterns
- Publishing unsupported defect-rate claims
From Triage to Resolution: The Full Decision Path
This closes the loop between the quick triage checklist and the reinstall/replace/RMA table above: identify the symptom → confirm model and part → check device history → power down safely → inspect connector and cable → verify the pre-installation test result → reproduce and document → cross-test against a known-good unit → classify the likely source → then act - correct the installation, escalate to device diagnosis, or submit an RMA with the batch and failure code recorded, and feed the outcome back into the next purchasing or training decision.
FAQ
Why is an iPhone replacement screen black after installation?
A black screen can come from a panel or driver defect, a connector that isn't fully seated, debris in the connector area, or a pre-existing device-side display circuit issue. Power down and reseat the connector, then test with a known-good screen or device before assuming the screen is faulty.
What causes ghost touch after screen replacement?
Ghost touch is often linked to touch-layer instability, a connector or flex-cable issue, installation pressure, housing deformation, or interference from the charging environment or an accessory. Retest with the device unplugged and case removed before escalating.
Why does a replacement screen flicker?
Flickering can stem from panel or backlight instability, a driver issue, a loose connector, installation pressure, or an incorrect model or product variant. It should be diagnosed rather than resolved by pressing on the display.
How can a repair shop tell whether the screen or the phone is faulty?
Known-good cross-testing - trying the suspect screen on a known-good compatible device, and a known-good screen on the original device - is the most reliable way to narrow down the cause before deciding on a next step.
Why does a screen work before installation but fail afterward?
This can result from a pinched or stressed flex cable, excessive installation pressure, connector movement, or housing deformation introduced during assembly - but it doesn't rule out a latent screen defect or an intermittent device-side fault.
When should a replacement screen be submitted for RMA?
Generally when a known-good comparison shows the fault follows the screen rather than the device, when there's clear physical evidence of a manufacturing defect, or when the issue matches a documented batch pattern - supported by photos, video, and test records.
Conclusion
A single symptom - a black screen, a flicker, a line, a dead pixel - can have more than one possible source, and it should never be enough on its own to conclude that a screen is defective or that an installation was done incorrectly.
Reliable diagnosis depends on pre-installation testing, known-good cross-verification, and documented evidence at every step. Repair shops that record the actual root cause, rather than defaulting to "bad screen," reduce disputes and rework over time. Wholesalers that analyze failure data by verified cause, model and batch are better positioned to manage quality control, product grading and supplier relationships.

Need help reviewing a suspected screen fault? Send our technical team the iPhone model, screen code, batch number, pre-installation test result, and clear fault photos or video. We'll help you determine whether the next step is reinstallation, device-level diagnosis, replacement, or an RMA request.